How is everyone out there in cyberspace today??? Hope this article finds everyone in good spirits!!! Well today I’m bringing you a tutorial with pictures of the Broadway ImPress Manicure! But before we get into that – I want to first give you an update on my last manicure where I used Kiss Nail Dress. Remember the post I did on February 28, entitled “A Wild and Exotic Manicure“? In that article, I showed the products Kiss Nails had sent me, as well as a tutorial on using Nail Dress. I did the manicure with Kiss Nail Dress the weekend before I posted the article. And I’m SO excited to report and also to SHOW you that Kiss Nail Dress DOES last for even longer than the package says, and that it really doesn’t chip!!
I’ve loved the Kiss Nail Dress ever since it came out! But now I actually get to show you that, in fact they do last the test of time. And I have the pictures to prove it~!
Here’s what my nails looked like when they were first applied (Feb 25th) and right before I removed them (removed March 9,2012):
Feb 25->
 March 9->

SEE??? AMAZING!!! Every time I’ve applied these little beauties, I’ve never been disappointed!!! I was just at a family party the night before I removed these, and was still getting compliments and people asking if I”d gone to a salon to get them done! Pretty amazing after applying them February 25th, and removing them March 9th!!! That’s a whopping 13 days – and they were still going strong! They were obviously growing out, and the one thing I could notice, is that they were starting to look a little worn, but apparently I was the only one who noticed that!!! Considering that was after 13 days, I definitely think this is an amazing product!! Also I want to point out, that all I had to do to remove them was to simply peel them off! Its THAT simple!! Easier than applying nail polish, lasts way longer than nail polish AND way easier to remove than nail polish!! I honestly am such a HUGE fan of these products!!
And I’m not sure how your nails fare, ladies?? But for me, I need to keep mine filed and polished for them to stay strong and long. If I take polish off, and keep it off for an extended period of time, my nails readily start chipping! So that’s definitely an incentive for me to keep them very well manicured! And the Nail Dress kept them from chipping and they grew very nicely!!!

As you can see in this picture – each nail strip is fully intact! Not one is torn or chipped! Told ya! ![]()
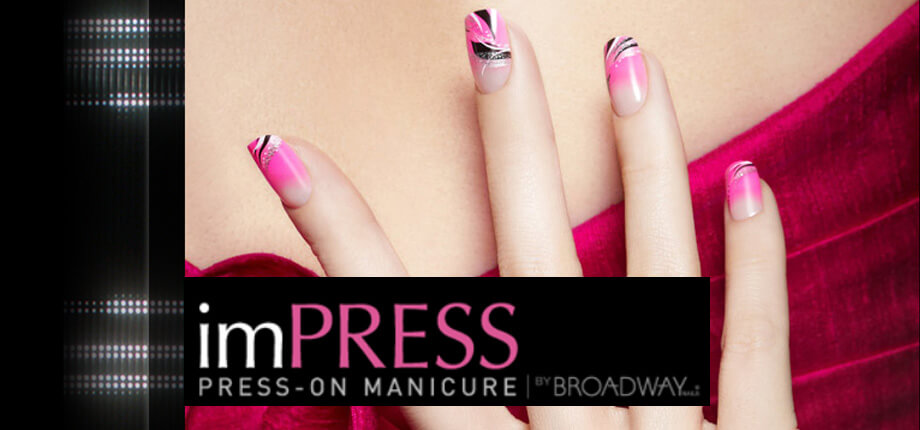
Now Are You Ready For An “ImPress-ive” Manicure?

So now that I’ve removed my Kiss Nail Dress, its time to try out a new product on my nails! I’m featuring the new Broadway ImPress Manicure in this post! And even though I’d already used Kiss Nail Dress prior to writing the last article and prior to receiving those products; I want to let you all know, I’ve never tried the Broadway ImPress Manicure before!
In the past, I’d never purchased the ImPress Manicure because I’m not really into “Press On” nails, and I thought they were press on’s. But after speaking with Kiss Nails PR Company, I found out they are, in fact, a press on gel manicure. So that intrigued me, and I was definitely open to trying them.


As you can see, they carry SO many different designs and colors! So there really is something for everyone! And these are just a few of the designs they carry – they actually have 36 different styles to choose from!
I also love the packaging!!! They are perfect for sticking in your nail polish stashes, with the packaging designed just like a nail enamel bottle!!! And since they are clear bottles, you can always find the right color or design without any effort!!! So cute and so fun!!!

This is the design I used for my very first manicure with these little beauties! Isn’t it super cute??? Its called “Working Girl” and each ImPress package comes with 24 nail covers in 12 sizes.

So I read the intructions, and it looked very straight forward. They are literally “peel and stick”, after you clean your nailbeds with the wipe that’s included in the package.

Before I began sticking them onto my nails, I made sure to find the correct sizes for each nail. I then laid them out neatly, so it would be easy to start applying them when I was ready! After they were all laid out, I prepped my nails by taking care of cuticles, filing my nails and then using the wipe included to clean the nailbeds.
After removing the backing, I began by sticking them, one by one, starting with the pinky finger and working my way to the index finger. Each time I applied one, I would hold it down to my finger for a couple seconds to ensure maximum adhesion. Then I did this for the other hand – leaving both my thumbs until all the other nails were done. Then applied them to my thumbs. They were so easy to apply – it kind of shocked me!!! Super simple!!! ![]() I love that!!!
I love that!!!
 –>
–>

After they were all applied, I decided to trim them to my desired length. So I clipped them with nail clippers, then filed them to smooth out and properly shape them. And I have to say – it was super easy to cut them, and were extremely easy to file as well! As you can see the picture on the left is before I’d trimmed them, and the picture on the right shows after they’d been trimmed! These definitely qualify as “Wham Bam Instant Glam” for your nails!!!
I have to say, I’m really excited about this product; because as I type this to you I’m on my 4th day of wearing them and they aren’t even showing any signs of lifting!!! They look SO natural but yet perfect and professionally done!!! I don’t know about you – but quite often 1 or more of my nails will break, leaving me with nails that aren’t all the same length. Well, let me tell you ladies – this WILL solve that problem!!! I find myself staring at my nails quite often, as they look so beautiful and perfect!!! I think I have a new obsession!!!
Honestly if these last a full week, I’ll be totally happy!!! When you think about having a professional-looking, perfect manicure, that only required you to peel and stick!!! Doesn’t get simpler and more budget-friendly for a professional-looking product!!! And when you take into account, you can often find these on sale and there are coupons to use on these; its a win-win!!! Speaking of coupons, ImPress Manicure is offering a $1 off coupon on their website (At the time I wrote this) – so check that out!!!
I’m going to continue wearing these little beauties, and report back to you; to let you know how long in fact they did last, and how they leave your actual nails looking after removing them!
Well my cyberspace peeps, this has been a TON of fun! And I want to give a big shout out and THANK YOU to Kiss Nails and Broadway Nails for these amazing products!!! Stay tuned in the coming weeks for my update and follow up to this manicure – so you can see if this will be a product you should add to your beauty stash!!!
Till next time Chicas (and Chicos), you can always keep it fast and easy, while keeping it glam, if you are open to trying something NEW~! xoxo
Comments
Trackbacks for this post