Battle of the Lip Butters – Which Product Will Emerge Victorious?


With the new wave of moisturizing, highly pigmented “Lip Butters” that each brand is releasing, which one reigns supreme? Well that’s what we’re going to explore! In comparing products from the different drugstore brands, I hope to help you choose the best “Lip Butter” that is suited for your needs~!


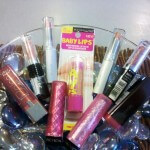
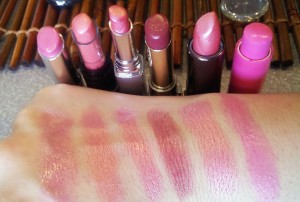
Up for your consideration are Revlon Lip Butters, Wet n Wild Megashield Lip Colors, Wet n Wild Wild Shine Lip Lacquers, Loreal Color Riche Balm, Covergirl Lip Perfection and Maybelline Baby Lips. When doing this comparison I had to add the Wet n Wild Lip Lacquers – they totally fall into this category, as well as the Covergirl Lip Perfection~! (By the way – a little sidenote – to make the color swatches stand out on my hand more – I added more light in photoshop. As a result, my hands showed up looking ghostly white… they are normally an olive skin tone. My hubby came into the room while I was adding pictures to my post and asked “What’s with the ghostly white hands?” haha)


THE CONTENDERS

Revlon “Lip Butter”

http://www.revlon.com/Revlon-Home/Products/Lips/Lipcolor/Revlon-ColorBurst-Lip-Butter.aspx

Revlon says: Buttery balm with beautiful shiny color to give you baby soft, healthy glowing lips 94% of women felt lips were softer, smoother, and instantly hydrated.

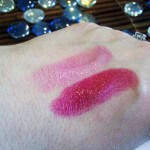
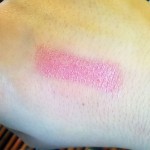
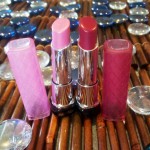
On the left we have #045 Cotton Candy, a beautiful soft and light pink. Cotton Candy was definitely on the lighter side when it comes to pigment – a more sheer pink. On the right is #010 Raspberry Pie, a gorgeous hot pink! I have to say, I was shocked with how highly pigmented this one is – definitely don’t need to apply much to get a nice raspberry shade! Both went on smoothly, with a subtle hint of shimmer, and were very moisturizing. These are little tubes of heaven!


Wet n Wild “Megashield Lip Color”

http://wnwbeauty.com/product.php?cid=16&pid=913&subid=28

Wet n Wild says: Color, comfort, and care! Luxurious color delivers hours of sheer-to-moderate coverage that glides on buttery-soft for a smooth, moist-looking pout. Lips are pampered with Vitamin E, Amino Acids, Avocado Oil, and Rice Bran Oil that moisturize and condition for silky, soft comfort. And with SPF 15, lips are cared for and protected from harmful UVB rays.

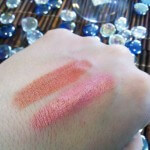
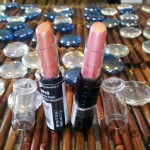
On the left we have #361S Peachy Keen, a peachy nude color. Peachy Keen was very high in pigment, and leaning more towards the matte side with little, to no shimmer. On the right we have #373S Pink Champagne, a peachy light pink. Pink Champagne was also very highly pigmented, and although this one had more shimmer than Peachy Keen – it was still a very subtle shimmer. These were smooth, moisturizing colors but felt more like a moisturizing matte lipstick.


Wet n Wild “Wild Shine Lip Lacquer”

http://wnwbeauty.com/product.php?cid=16&pid=63&subid=28

Wet n Wild says: Two-in-one lipstick provides full-coverage color and a brilliant glossy shine. Creamy color moisturizes lips while light-reflecting particles give a luminous sheen.

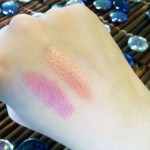
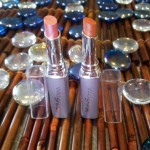
On the left we have #922 Enamoured, a pretty cotton candy pink. On the right we have #920 Fling, the quintessential peachy color. With the Lip Lacquers, I found both to be highly pigmented, moderately shimmery, beautifully smooth and very moisturizing! One thing that set these apart, was that both colors were equally pigmented and equally shimmery. With other brands I find sometimes the pinks and peaches can be so lightly pigmented, while the reds/browns hold more pigment. I guess you could say I’m “passionate about pigment” – I feel every color should be equally pigmented! So if you want a beautiful cotton candy pink – you shouldn’t have to apply 2 or 3 times more to get the color you see in the tube. Although if a lip product is created to be more sheer, that’s great – just keep the pigments equal across the board.


Loreal Color Riche “Balm”

http://www.lorealparisusa.com/_us/_en/default.aspx#/?page=top{userdata//d+d//|diagnostic|main:beautyfilter//category+F1_Cosmetics_Lips_LipCare//|media:_blank|nav|overlay:_blank}

Loreal says: This tinted SPF 15 Lip Balm provides a hint of luscious, kissable color, smoothing lips instantly and for a full 8 hours of continuous hydration. Lips are soft and supple all day long – and keeps conditioning after its been removed.

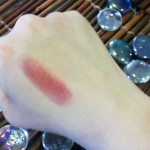
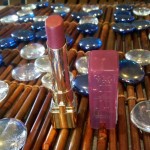
Here we have #219 in Plush Plum, a very soft mauvey plum. Loreal “Color Riche Balm” kind of surprised me – with the name “Color Riche” I was expecting a great deal more pigment than what was delivered. Having said that, it is still a beautiful, soft, and moisturizing mauve lip color.


Covergirl “Lip Perfection”

http://www.covergirl.com/lipperfectionlipcolor

CoverGirl says: Bright, gorgeous color that can transform your day and your lips. Enriched with a silk moisturizing complex, our formula helps sustain moisture levels and helps create soft, smooth, beautiful lips in just 7 days. Also a 2011 Cosmopolitan Beauty Award Winner!

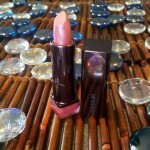
Here we have #390 in Sweetheart, a bright, frosty, light pink. I was really happy with how highly pigmented it is, while still going on smoothly and staying moisturizing! With Covergirl’s “Lip Perfection” you really DO get the color in the tube, on your lips without having to apply much at all!


Maybelline “Baby Lips”

http://www.maybelline.com/products/154

Maybelline says: SPF 20 Moisturizing Balm. No more basic lip balm Lip renew formula and 8-hr hydration for visibly renewed lips in 4 weeks. Clinical care for baby-soft lips.

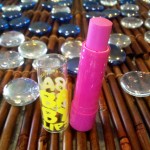
Here we have#25 in Pink Punch, a bright, vibrant bubblegum pink. I was shocked how much I loved this line! These little tubes come deliciously scented, with a moderate amount of pigment, some shimmer and lots of shine! I can definitely see myself getting more of these~!


POINTS TO CONSIDER

Most Moisturizing (Ranked in order)
1. Maybelline Baby Lips (Felt very glossy)
2. Revlon Lip Butter (Glossy and rich – no stickiness)
3. Loreal Color Riche Balm (Glossy without being sticky)
4. Wet n Wild Lip Lacquer
5. Wet n Wild Megashield Lip Color
6. Covergirl Lip Perfection

Having said this – each one of these was highly moisturizing and not one of them was even close to dry! So even at the bottom – Cover Girl still felt amazingly good!


Highest Pigment (Ranked in Order)

1. Wet n Wild Lip Lacquer
2. Wet n Wild Megashield Lip Color
3. Cover Girl Lip Perfection
4. Revlon Lip Butter
5. Loreal Color Riche Balm
6. Maybelline Baby Lips

I just want to point out that I was impressed with all of the pigments in every one of these! The drugstore cosmetic brands have really stepped up their game and could EASILY compete with, if not beat out, any department store brand!


Best “Luxe” Packaging (Ranked in Order)

1. Revlon Lip Butter (No brainer – gorgeous case!)
2. Loreal Color Riche Balm (Beautiful!)
3. Covergirl Lip Perfection
4. Wet n Wild Lip Lacquer
5. Maybelline Baby Lips
6. Wet n Wild Megashield Lip Color (Although I DO adore Wet n Wild, these tubes felt and look kinda cheap)

While coming in very close in the pigment and moisturizing categories, the best packaging category was another verdict entirely. They were all so different – from Fun, Youthful, Sporty packaging (Baby Lips), to Luxe (Revlon, Loreal and Covergirl), to kind of non-descript (Wet n Wild). Having said that, I don’t purchase products based on this category – this is just an “icing” on the cake kind of thing. At the end of the day – the best “performing” product will ALWAYS win out for me~!


A WINNER EMERGES….

I honestly love ALL of these products for different reasons, so they are all winners in my book~! So this will definitely be a personal preference, that’s why I broke it down above into different categories. But for me, the winner is definitely the REVLON LIP BUTTERS! Super duper moisturizing, moderately pigmented and gorgeous “luxe” packaging~! As moisturizing as Maybelline was, I couldn’t choose the Baby Lips because I was looking for much more pigment. And as much as I LOVED both of Wet n Wild’s products and Covergirl’s, theirs came in higher in pigment and lower in moisturizing – which for me likened them more to a lipstick. Way to go Revlon, this product could definitely hold its own against its more expensive department store counterparts!!!

I hope you feel more “informed” the next time you hit your local beauty counter – so you are able to buy the right lip product that will suit your needs~! Till next time my beauties- keep those lips glam while ALSO keeping them moisturized~! ;)

Its A Nail Epiphany – A Long-Lasting Glittery Manicure

Featured-Image-Nail-Epiphany


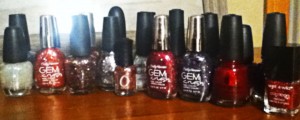
Hello My Beauties~! I know its been a while since my last post – we’re finally getting over the “hump” of being sick. And we’re feeling better – and back to blogging for me~! I’ve got a lot of fun beauty posts coming up; but I wanted to start out with this fun Nail Review. This is really exciting! (I know – what can I say – all things girly excites me~!) Below is a few of the glittery nail polishes I have in my stash that will now be getting a LOT more use~!

As many of you know, I have natural nails. And in the recent months I’ve been frustrated (to say the least) with my stash of glittery, blingy nail polishes. I’ve tried ALL different brands, and no matter what brand I use – after only a day or two of wear, my nail polish will literally start peeling off! I’m always meticulous to prep my nails properly, file them, take care of the cuticles etc etc…I’ve had enough manicures to know just how to duplicate it at home. And yet after all that effort the nail polish won’t chip, like regular nail polish, but peel off! That is until now~!

You see this??? This is my beautiful, glittery pink manicure after SEVEN days of wear!!! Yes, count’em ladies – 7 days~! And I’m not easy on my nails – doing dishes, helping my boys with their projects etc! So I definitely wanted to share with you all the secret to a “Long-Lasting Blingy Manicure”~! The trick here is doing it in two parts over two days, as well as having a good quality colored polish underneath. Over the course of two nights makes it less time each night and also allows the nail polish to fully cure and harden between layers. The good quality colored polish underneath the glitter polish, allows the glitter coat less chance of peeling because of our natural nail oils.


The First Evening

1. Apply a good base coat, after filing, buffing, and fully prepping your nail beds . I use this one from Sally Beauty Supply – its a HUGE bottle~! http://www.sallybeauty.com/Gripper-Basecoat/SBS-113140,default,pd.html


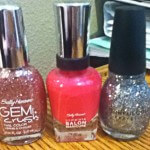
2. Apply two coats of the Sally Hansen Complete Salon Manicure for the next step. Here I’m using #530 “Back to the Fucshia” (a gorgeous, bright, vibrant pink); I’ll often choose a color close too/similar too the glittery polish I’m using. What I love about this polish, aside from the awesome brush, it has great staying power on natural nails! Much better than OPI! But that’s a personal choice – I’ve tried SO many brands, and I’ve experimented with different base coats, manicure techniques etc. And these little polishes I find are by far the best of the bunch! Sally Hansen Website: http://sallyhansen.com/ and here’s the Sinful Website (Currently under construction) http://www.sinfulcolors.com/


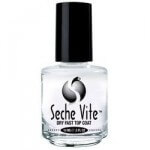
3. Lastly, apply a good quality top coat and let dry. Don’t mess with your nails too much for a good while. I always try to do my manicures after putting my kids to bed, in the evening right before I go to bed. That way all the household chores, or playing with kids etc won’t interfere with your manicure. This is the last step for this evening. http://seche.com/products/product-83005.html


The Next Night


1. Apply the base coat on top of your existing manicure.


2. Now apply the Glittery polish to your nails – two coats total. I used the Sally Hansen Gem Crush in #06 “Razzle Dazzler” for all of my nails except the ring fingers on both hands. On my ring finger on both hands, I used SinFul Colors #923 in Queen of Beauty (a silver glitter). I usually like to do a different color on my ring fingers when doing my manicure – makes for a fun, yet interesting, looking manicure~!


3. Now its time for the final step, which is applying your top coat! Again, try to do this right before bed so your nails will have a good amount of time to dry and cure without any interference.


And VOILA – that’s IT~! Not terribly difficult, or time consuming – but doing the manicure in these two steps over two night really does extend the life of your manicure! In the past, I’ve tried just doing the whole manicure in one night, or changing up how many coats you use, etc to no avail; It still would end up chipping or peeling. It really seems to make a difference dividing this up into two nights, doing so lets the polish cure and harden in between coats which results in the extended life of a manicure! And make sure to do this manicure in two consecutive nights. If you wait a couple of days in between steps, you’re more likely to have chipping on your base color, which will definitely affect the next coat; Resulting in a shortened life of your manicure. Oh and just a sidenote to this, I always do my manicures over two nights even when I’m not using a glittery polish. This has always seemed to extend the life of my manicures!

I’m definitely extremely happy with this manicure – the durability, length of wear and how BLINGY it is~! Who knew – a blingy manicure that ACTUALLY has staying power on natural nails~! Yes ladies, this definitely qualifies as a NAIL EPIPHANY in my books! ;)

Stay tuned, I have a lot of fun beauty posts coming up, as well as some DELICIOUS and easy recipes~! Till next time Chicas – take care, stay glam and KEEP IT BLINGY~! xoxo

Top 10 Splurge and Steal Eyeshadow Palettes

Featured-ImageEyeshadowPalettes


After just finishing my Sequence of a Smokey Eye Post, I thought it would be fitting to do a top 10 Eyeshadow Palette Review~! I should first let you know that I am a former “eyeshadow snob”. I never used to buy eyeshadow in the drugstore, because of the lack of pigment and color selection. But a couple of years ago, after trying a couple of brands at the drugstore I felt like I’d discovered treasure ~! Yes, I was shocked! Highly pigmented, unique colors at a bargain price??? Who knew???

So I’ll just let you know, when I’m reviewing these palettes, I look for a couple of things. First and foremost – how pigmented is the palette? I’m not interested in eyeshadows that you have to apply so much to your lids to get the color shown in the palette. Or the shadows that never really look as bright on your lids as they do in the palette, no matter how much you apply.

Secondly, I look for range and unique colors. You want them to stand up to your department store counterparts – not produce the same colors every line comes out with. When you go to the MAC counter at Nordstrom – you see every color of the rainbow times 100!!! And although, you won’t find as many colors in the drugstore – you should still be able to pick up some fun and unique colors that emphasize your eyes~!

And they are ranked in order from 1st to 5th for both Drugstore and Department store. So here ya go, fellow beauty junkies ~ read on…..


STEAL:


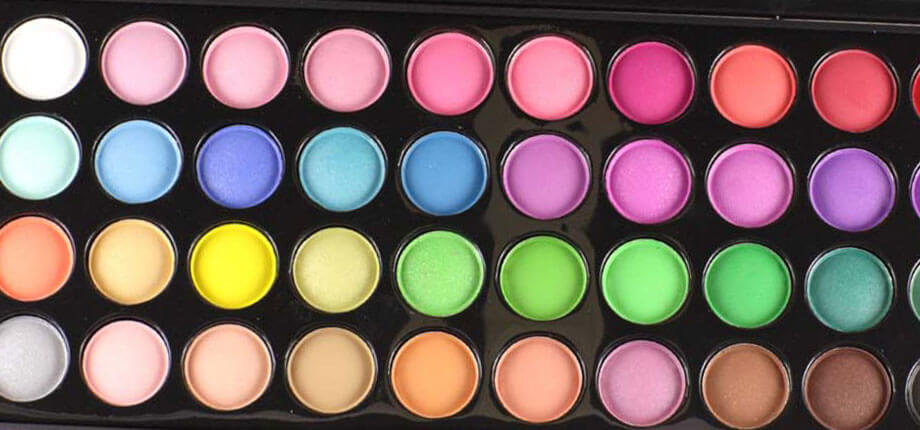
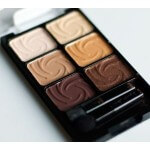
1. Wet and Wild ColorIcon Palettes: I know, shocker right? (haha, not~!) Yup, these are number one for a reason – amazing colors and highly pigmented! One of the few undiscovered treasures at the drugstore. And add to it, that these are the palettes that converted this former department store snob into a drugstore glamourista~!


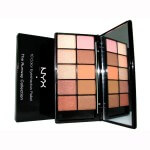
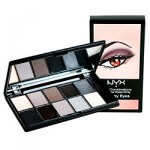
2. NYX Palettes: These little beauties come packaged in a sleek “professional” looking black case. Each one comes with beautiful, highly pigmented colors. They have everything from natural looking to vibrant ones~! Gorgeous~!


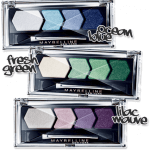
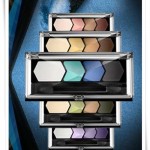
3. Maybelline Eye Studio Palettes: These quads have amazing texture and pigment. And with the clear lids – makes it easy to find the colors you want when you’re getting all “glammed up”.


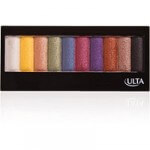
4. Ulta Eye Shadow Palettes: Ulta has come out with a great range of colors, pigments and textures for their eyeshadows.


5. Revlon Eye Shadow Palettes: Revlon has a nice selection and wide variety of eye shadow palettes. I haven’t tried the new Colorstay 16 hour eye shadow quads yet, but those look amazing. Hopefully will have to try them soon and review them~!


SPLURGE


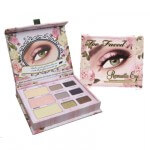
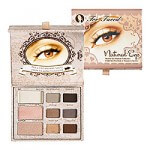
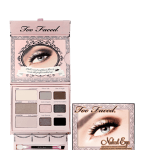
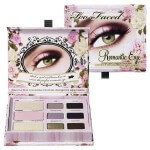
1. Too Faced Eye Shadow Palettes: Can’t say enough amazing things about these little palettes. Not only do they come with beautifully pigmented eyeshadows in a great selection of colors; BUT they also come with 3 handy dandy cards that show you different looks and just how to apply them! These palettes are a “no-fail” guide to amazing eyes~!


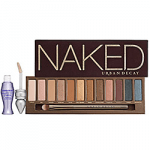
2. Urban Decay Naked Palette: Of course, right??? This palette probably made famous last year by its extreme popularity, and how fast it sold out of all stores and online – and took quite a few months before stores saw their stock replenished! The colors are amazing~! A definite must have~! They have since come out with the Naked Palette 2 – which looks like another winner~!


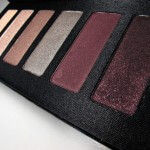
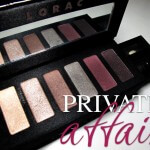
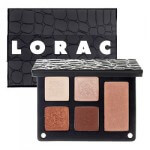
3. Lorac Palettes: Lorac produces amazing colors that are rich with pigment. The above two are the Private Affair Palette and one of their Croc Palettes. You definitely can’t go wrong with Lorac~!


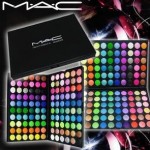
4. Mac Palettes: Mac comes out with several different palettes throughout the year and still continues to be at the top of the industry for their wide variety of colors and textures. They truly DO have something for everyone~!


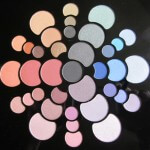
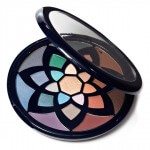
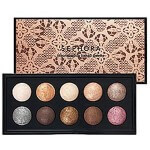
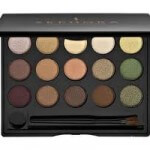
5. TIE~~!!! Between Stila (the two palettes on the left) and SEPHORA (the two palettes on the right) : Stila is, and always have been, amazing with colors and pigments. And Sephora has produced some amazing eyeshadow palettes as well~! Beautiful~!


I hope you enjoyed this Eyeshadow Edition of Splurge and Steal Beauty! I love palettes, because aside from being extremely economical – you get beautiful and complimentary colors with no effort on your part. Several times I’ve discovered new and unique shades I would have never purchased individually – but given the chance, they’ve quickly become some of my fave colors~! Palettes seem to INSPIRE experimentation with color – which I love to do~! Well my beauties, that’s it for me! Remember keep it glam, keep it colorful, and never stop experimenting~!

Sequence of a Smokey Eye

SmokeyEyeAlternate


Hola peeps~! Thought it would be fun to do a “step by step” Smokey Eye post! Always a fun and glam way to emphasize one of the most important features on our face~!

On a daily basis, I usually just use a matte black eyeliner and mascara. But for a night out, its nice to draw attention to the eyes and Smokey Eyes is a great way to acheive this~! For this GLAMALICIOUS look I’m using the….


Wet and Wild ColorIcon Palette in Vanity.

I’m using the three colors on the left – going for a subtle, smokey eye this time. ;) Here’s a link to the Wet and Wild Website – They have gorgeous palettes and many other great products – very highly pigmented!

Here I am with no eye makeup

…(Please excuse the photography – my camera is “old school” lol)


1. Applying the Base and Crease Color.

First apply the middle Taupe shade to your whole lid. Then apply the darker shade to the outer corners and under your eye.


2. Adding the Highlight.

Now, apply the lightest shade to the inner corners of the top and bottom of your eyes. Adds a nice highlight and draws the eyes to the center of your face, while brightening your eyes.


3. Lining the Eyes.

Next line the upper lids with a matte black shadow.


4. Don’t Forget the Lashes!

And now its time for Mascara~! Really finishes off the look – and makes those eyes stand out~!


5. Completed Look~!

Here’s the Smokey Eye Look showing both eyes~! The look is complete and now ready for a night out~!

In future articles, I’ll change up the looks with different colors and different palettes. And also be on the look out for my next article which will feature the best eye palettes – with both splurge and steal categories~! What are your favorite eye products when you want to look glam? Till next time Chicas, keep it glam and keep it SMOKEY~! ;)

Wham Bam, INSTANT Glam~!

In a world of drive thru coffees, drive thru dry-cleaners, drive thru pharmacies, and drive thru fast food ; why not a product that makes for an instant manicure? Well the convenience generation has finally invented a beauty product that IS a convenient manicure which not only delivers easy application – but staying power of 10-14 days on your natural nails! I have to say, at first I was more than a little skeptical, when most nail polishes chip within a couple days of application. But after going to my local drugstore and finding them on an amazing sale (plus I had some manufacturer coupons), and seeing that the patterns available could never be acheived by mere mortals; I thought I’ll give these little beauties a whirl~!

I’m talking about the new stick-on nail enamel strips. You can find them at your local drugstores and big beauty chains like Sephora. And yes, they are beauty tested – and I definitely approve! Speaking as a busy Mom, one who gets her hands dirty cleaning the house and dealing with the kids – these little inventions DO hold up better than most nail enamel (on natural nails). And anything that can keep my nails looking glam for up to 10-14 days with only one application – is a a little nail miracle in a box. I’ve tried so many brands (even salon brands) of nail polish and they all take only a couple days to start chipping pretty badly. And when this happens, after you’ve spent so long making them look so nice – it’s almost like why bother? Who has time to do their nails every other day? Most of us don’t – so these products are amazing for us with natural nails. (Although I’m sure they’d work just as well on fake nails)


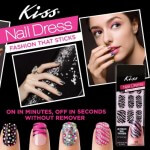
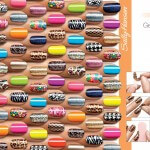
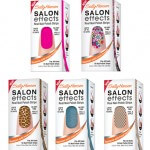
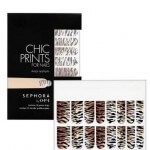
They come in many different brands – the ones I’ve seen are Sally Hansen Salon Effects, Kiss Nail Dress, and Sephora has their own brand of these as well. (I’ve also seen them at Sally Beauty Supply) I’ve tried Sally Hansen and Kiss so far, I have some Sephora beauties in my stash I have yet to try. Sally Hansen comes with 16 self adhesive nail strips in each package, while Kiss Nail Dress comes with 28 nail strips in each package. For my money – you get a better value with the Kiss Strips simply because they come with more per package – but Sally Hansen has a MUCH wider variety of patterns etc. Either way, when your nails are done – they look like they’ve been done at a salon – so when you look at it that way – both brands offer amazing value compared with getting your nails done at the salon. And that’s how you should compare it – these aren’t as cheap as nail polish, but they last longer, there’s no drying time or foul smell, and the designs are so intricate – its a much higher quality product overall.

What I found was, since I don’t have very long nails, with both Sally Hansen and with Kiss – to do all my 10 nails I only used 5 strips! So talk about adding extra bang for your buck~! Think about how many manicures you can get out of each box – now the price is looking even better. Especially when these often go on sale at Rite Aid and Walgreens, and there is frequently manufacturer coupons on both. If you don’t have any manufacturer coupons, don’t hesistate to ask your local drugstore’s beauty counter to see if they have any for you! They have saved me several times with coupons I didn’t have!

They way I apply them is:


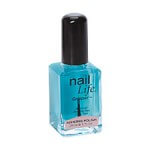
1. First apply a good quality base coat. If you have natural nails like mine, make sure you invest in a good quality base coat, it really WILL extend the life of any manicure you do. Personally I got a huge bottle of Nail Life Gripper from Sally Beauty Supply for less than $5, and it will last for SO long!


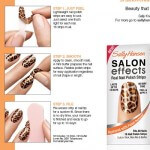
2. Second, match up the right size strips to the corresponding nails before you unpeel them. I usually start with matching up a strip with a nail on my right hand (since I am right handed, my nail beds are slightly larger on the right hand) After I find the right size – I’ll turn it around and see which nail it will work with on my left hand. Now that you know which fingers to use first, unpeel the strip and apply it to the larger nail bed. Press down and smooth out very well. Then get a sharp pair of small scissors and cut the excess off right above your nail (being very careful not to cut yourself or your nail). Then take the other half and turn it around so that the smooth edge borders the cuticle, and apply it to your other nail. After this, use your nail file and smooth the edges so they are seemless at the end. I like to use the less rough side, so you don’t take off to much of the nail enamel. Repeat this smoothing and filing process and do this for all of your nails after you’ve applied strips to both hands.


3. Apply a good quality top coat. I’m a fan of Seche Vite, and although it is pricey – ULTA or Sally Beauty will often have it on sale, so keep your eyes peeled for that! In addition Ulta will also have their coupons you can use on top of the sale prices – making it as cheap as any drugstore brand, but its much better!


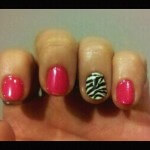
Here you see, I just added a Sally Hansen Zebra nail strip to my ring finger on each hand to jazz up an otherwise boring manicure~! So if you aren’t ready to bling-up every finger on your hands, you can just add one or two strips to each hand, and it makes for a fun and very glam manicure.

Remember Chicas, you can keep it glam on a budget and even as a busy Mom, just pick up a package of these little beauties the next time you are at the drugstore beauty counter and treat yourself to a “salon-inspired” manicure. Its “Wham Bam, Instant Glam” for YOUR nails~!