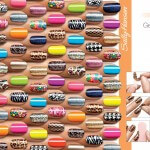
In a world of drive thru coffees, drive thru dry-cleaners, drive thru pharmacies, and drive thru fast food ; why not a product that makes for an instant manicure? Well the convenience generation has finally invented a beauty product that IS a convenient manicure which not only delivers easy application – but staying power of 10-14 days on your natural nails! I have to say, at first I was more than a little skeptical, when most nail polishes chip within a couple days of application. But after going to my local drugstore and finding them on an amazing sale (plus I had some manufacturer coupons), and seeing that the patterns available could never be acheived by mere mortals; I thought I’ll give these little beauties a whirl~!
I’m talking about the new stick-on nail enamel strips. You can find them at your local drugstores and big beauty chains like Sephora. And yes, they are beauty tested – and I definitely approve! Speaking as a busy Mom, one who gets her hands dirty cleaning the house and dealing with the kids – these little inventions DO hold up better than most nail enamel (on natural nails). And anything that can keep my nails looking glam for up to 10-14 days with only one application – is a a little nail miracle in a box. I’ve tried so many brands (even salon brands) of nail polish and they all take only a couple days to start chipping pretty badly. And when this happens, after you’ve spent so long making them look so nice – it’s almost like why bother? Who has time to do their nails every other day? Most of us don’t – so these products are amazing for us with natural nails. (Although I’m sure they’d work just as well on fake nails)
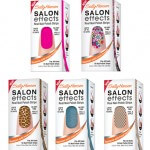
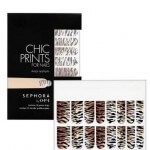
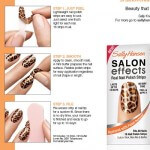
They come in many different brands – the ones I’ve seen are Sally Hansen Salon Effects, Kiss Nail Dress, and Sephora has their own brand of these as well. (I’ve also seen them at Sally Beauty Supply) I’ve tried Sally Hansen and Kiss so far, I have some Sephora beauties in my stash I have yet to try. Sally Hansen comes with 16 self adhesive nail strips in each package, while Kiss Nail Dress comes with 28 nail strips in each package. For my money – you get a better value with the Kiss Strips simply because they come with more per package – but Sally Hansen has a MUCH wider variety of patterns etc. Either way, when your nails are done – they look like they’ve been done at a salon – so when you look at it that way – both brands offer amazing value compared with getting your nails done at the salon. And that’s how you should compare it – these aren’t as cheap as nail polish, but they last longer, there’s no drying time or foul smell, and the designs are so intricate – its a much higher quality product overall.
What I found was, since I don’t have very long nails, with both Sally Hansen and with Kiss – to do all my 10 nails I only used 5 strips! So talk about adding extra bang for your buck~! Think about how many manicures you can get out of each box – now the price is looking even better. Especially when these often go on sale at Rite Aid and Walgreens, and there is frequently manufacturer coupons on both. If you don’t have any manufacturer coupons, don’t hesistate to ask your local drugstore’s beauty counter to see if they have any for you! They have saved me several times with coupons I didn’t have!
They way I apply them is:
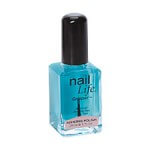
1. First apply a good quality base coat. If you have natural nails like mine, make sure you invest in a good quality base coat, it really WILL extend the life of any manicure you do. Personally I got a huge bottle of Nail Life Gripper from Sally Beauty Supply for less than $5, and it will last for SO long!
2. Second, match up the right size strips to the corresponding nails before you unpeel them. I usually start with matching up a strip with a nail on my right hand (since I am right handed, my nail beds are slightly larger on the right hand) After I find the right size – I’ll turn it around and see which nail it will work with on my left hand. Now that you know which fingers to use first, unpeel the strip and apply it to the larger nail bed. Press down and smooth out very well. Then get a sharp pair of small scissors and cut the excess off right above your nail (being very careful not to cut yourself or your nail). Then take the other half and turn it around so that the smooth edge borders the cuticle, and apply it to your other nail. After this, use your nail file and smooth the edges so they are seemless at the end. I like to use the less rough side, so you don’t take off to much of the nail enamel. Repeat this smoothing and filing process and do this for all of your nails after you’ve applied strips to both hands.
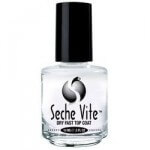
3. Apply a good quality top coat. I’m a fan of Seche Vite, and although it is pricey – ULTA or Sally Beauty will often have it on sale, so keep your eyes peeled for that! In addition Ulta will also have their coupons you can use on top of the sale prices – making it as cheap as any drugstore brand, but its much better!
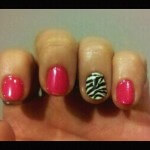
Here you see, I just added a Sally Hansen Zebra nail strip to my ring finger on each hand to jazz up an otherwise boring manicure~! So if you aren’t ready to bling-up every finger on your hands, you can just add one or two strips to each hand, and it makes for a fun and very glam manicure.
Remember Chicas, you can keep it glam on a budget and even as a busy Mom, just pick up a package of these little beauties the next time you are at the drugstore beauty counter and treat yourself to a “salon-inspired” manicure. Its “Wham Bam, Instant Glam” for YOUR nails~!

