An “ImPress-ive” Manicure and A Kiss Nail Dress Update

Featured-Image-Impress-Manicure

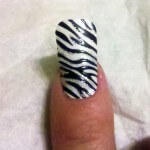
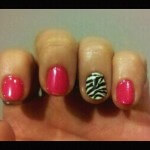
How is everyone out there in cyberspace today??? Hope this article finds everyone in good spirits!!! Well today I’m bringing you a tutorial with pictures of the Broadway ImPress Manicure! But before we get into that – I want to first give you an update on my last manicure where I used Kiss Nail Dress. Remember the post I did on February 28, entitled “A Wild and Exotic Manicure“? In that article, I showed the products Kiss Nails had sent me, as well as a tutorial on using Nail Dress. I did the manicure with Kiss Nail Dress the weekend before I posted the article. And I’m SO excited to report and also to SHOW you that Kiss Nail Dress DOES last for even longer than the package says, and that it really doesn’t chip!!

I’ve loved the Kiss Nail Dress ever since it came out! But now I actually get to show you that, in fact they do last the test of time. And I have the pictures to prove it~!

Continue Reading

A Wild and Exotic Manicure Reveal – Kiss Nail Dress Review

Featured-Image-Nails

Hey Chicas – how’s you day going? Its a beautiful, sunny (albeit cold) day – but no complaints here! I love the sunshine, just puts you in a good mood and is a little reminder that Spring is coming!

I just recieved some products from Kiss Nails and I’m so excited to bring you this post and reveal my “Wild Manicure”!

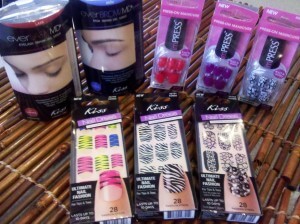
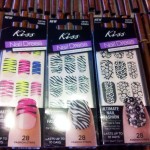
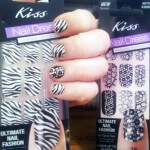
Here you see three packages of Kiss Nail Dress, 3 packages of Impress Manicure, Kiss Everlash MD Eyelash Enhancing Serum and Brow Enhancing Serum.

I’ll be bringing you reviews of the Impress Manicure and Everlash MD Eyelash and Brown Enhancing Serums in upcoming posts! So stay tuned for that~! I’m excited to try both products, they look fabulous!

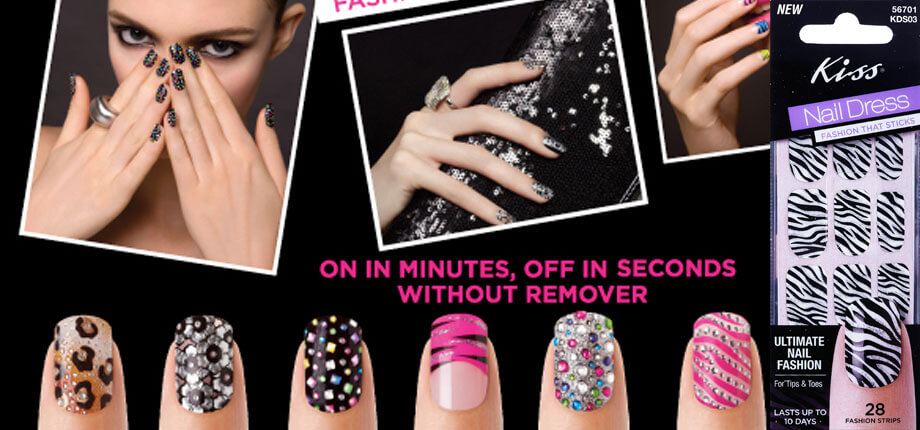
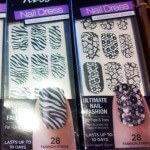
Now I’m not sure if you guys read my previous post on Wham Bam Instant Glam? In that post I talk about the different nail enamel strips and the pros and cons of each. Well as you saw, Kiss Nail Dress is my absolute fave! For several reasons, one being that it lasts the longest of all the nail strips I’ve tried, I find these don’t start “chipping” like some of the other brands do! And I’m definitely hard on my nails – playing with the kids (and their legos) , doing dishes and cleaning etc, all of which isn’t very manicure friendly! Also they come with 28 strips in each package which is a GREAT deal, the most strips per package of any set I’ve ever found. They’re easy to apply and easy to take off and you aren’t dealing with the regular nail polish smell! Definitely instant glam for us ladies~!


First thing I did was “prep” my nails. Filing them, taking care of the cuticles and buffing them.


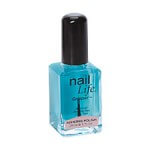
Once they were adequately prepped, I applied a base coat. I use Nail Life Gripper from Sally Beauty Supply.


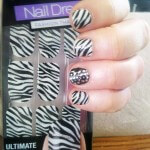
I applied the Zebra print to all of my nails except the ring fingers on both my hands, where I put one different strip from the other package. Makes for a fun and interesting manicure! I always love having either a different color or pattern on my ring fingers of both hands! If you want you can alternate regular polish with these strips, if the first time around you want a more subdued manicure. But I have to say I love “Wild” nails! When applying these, I’ll apply the strip to the nail bed and then cut off the excess; which I’ll apply to a nail on my other hand. So I only need 1 strip for 2 nails! Total strips used for this manicure is only 5!!! Not too shabby ;) ! And don’t be afraid to trim the cuticle portion when applying it to your other hand, because it may be to wide, which is such an easy fix! Make sure to press down and smooth them out well, then file the ends off.


After you’ve applied all your strips, apply a top coat.


And it’s done, my wild and exotic manicure! Do you like it??? One thing that’s such a bonus, is when you are ready to remove them, they just peel off! Which I didn’t know the first time I went to take them off, and I was so shocked! Having them come off so easily – yet stay on your nails SO long and so well! Don’t know what kind of adhesive they use – but its amazing~! ;) The smell of nail polish remover bothers a lot of people, so this is a great option for those of you who have that issue (like my mom ;) )!

Big Kudos to Kiss Nails for creating these fabulous products for us ladies to stay looking glam so effortlessly and affordably~! I was at my son’s Football practice tonight and I got so many compliments and inquiries on my manicure – they are definitely a hit! I also wanted to mention, these packages come with wide enough strips that work perfectly for doing pedicures, so you can do either or both – a matching Mani/Pedi~! I’m excited to see what new designs they come out with next! I hope they expand their line to include some solid colors and of course more patterns! I love my patterns~!

Oh and before I forget, I want to remind you ladies Kiss is having a giveaway on their Facebook Fan Page – when you go to there, click the “Freebies” tab on the left hand side. Or, you can go there directly from my site, by clicking the “Kiss Giveaway” banner on the top right hand side of my website! That way you can enter for a chance to score some of these little beauties! Keep your eyes peeled, as I’ll be bringing you reviews of the Impress Manicure and the Brow and Eyelash Enhancing Serums – always my honest and objective opinions! Till next time Chicas – keep it wild, keep it exotic and always keep it glam~! xoxo

Its A Nail Epiphany – A Long-Lasting Glittery Manicure

Featured-Image-Nail-Epiphany


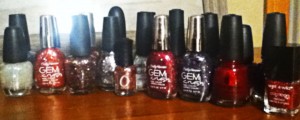
Hello My Beauties~! I know its been a while since my last post – we’re finally getting over the “hump” of being sick. And we’re feeling better – and back to blogging for me~! I’ve got a lot of fun beauty posts coming up; but I wanted to start out with this fun Nail Review. This is really exciting! (I know – what can I say – all things girly excites me~!) Below is a few of the glittery nail polishes I have in my stash that will now be getting a LOT more use~!

As many of you know, I have natural nails. And in the recent months I’ve been frustrated (to say the least) with my stash of glittery, blingy nail polishes. I’ve tried ALL different brands, and no matter what brand I use – after only a day or two of wear, my nail polish will literally start peeling off! I’m always meticulous to prep my nails properly, file them, take care of the cuticles etc etc…I’ve had enough manicures to know just how to duplicate it at home. And yet after all that effort the nail polish won’t chip, like regular nail polish, but peel off! That is until now~!

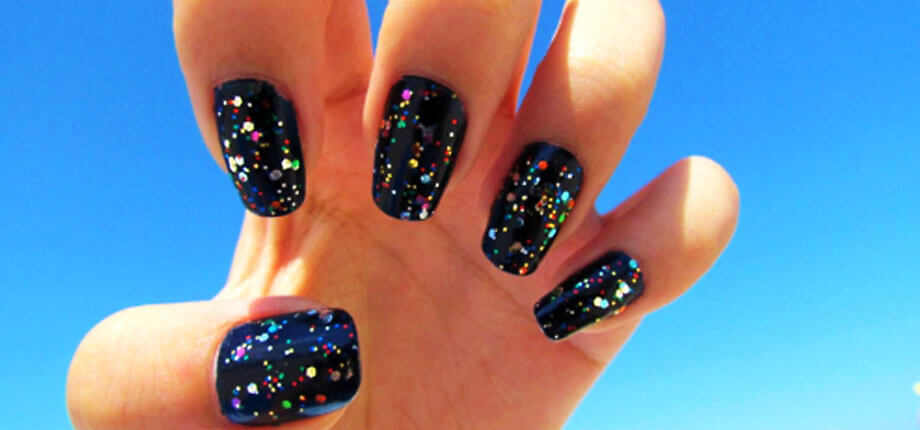
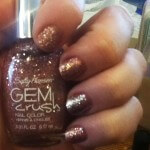
You see this??? This is my beautiful, glittery pink manicure after SEVEN days of wear!!! Yes, count’em ladies – 7 days~! And I’m not easy on my nails – doing dishes, helping my boys with their projects etc! So I definitely wanted to share with you all the secret to a “Long-Lasting Blingy Manicure”~! The trick here is doing it in two parts over two days, as well as having a good quality colored polish underneath. Over the course of two nights makes it less time each night and also allows the nail polish to fully cure and harden between layers. The good quality colored polish underneath the glitter polish, allows the glitter coat less chance of peeling because of our natural nail oils.


The First Evening

1. Apply a good base coat, after filing, buffing, and fully prepping your nail beds . I use this one from Sally Beauty Supply – its a HUGE bottle~! http://www.sallybeauty.com/Gripper-Basecoat/SBS-113140,default,pd.html


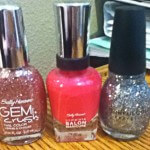
2. Apply two coats of the Sally Hansen Complete Salon Manicure for the next step. Here I’m using #530 “Back to the Fucshia” (a gorgeous, bright, vibrant pink); I’ll often choose a color close too/similar too the glittery polish I’m using. What I love about this polish, aside from the awesome brush, it has great staying power on natural nails! Much better than OPI! But that’s a personal choice – I’ve tried SO many brands, and I’ve experimented with different base coats, manicure techniques etc. And these little polishes I find are by far the best of the bunch! Sally Hansen Website: http://sallyhansen.com/ and here’s the Sinful Website (Currently under construction) http://www.sinfulcolors.com/


3. Lastly, apply a good quality top coat and let dry. Don’t mess with your nails too much for a good while. I always try to do my manicures after putting my kids to bed, in the evening right before I go to bed. That way all the household chores, or playing with kids etc won’t interfere with your manicure. This is the last step for this evening. http://seche.com/products/product-83005.html


The Next Night


1. Apply the base coat on top of your existing manicure.


2. Now apply the Glittery polish to your nails – two coats total. I used the Sally Hansen Gem Crush in #06 “Razzle Dazzler” for all of my nails except the ring fingers on both hands. On my ring finger on both hands, I used SinFul Colors #923 in Queen of Beauty (a silver glitter). I usually like to do a different color on my ring fingers when doing my manicure – makes for a fun, yet interesting, looking manicure~!


3. Now its time for the final step, which is applying your top coat! Again, try to do this right before bed so your nails will have a good amount of time to dry and cure without any interference.


And VOILA – that’s IT~! Not terribly difficult, or time consuming – but doing the manicure in these two steps over two night really does extend the life of your manicure! In the past, I’ve tried just doing the whole manicure in one night, or changing up how many coats you use, etc to no avail; It still would end up chipping or peeling. It really seems to make a difference dividing this up into two nights, doing so lets the polish cure and harden in between coats which results in the extended life of a manicure! And make sure to do this manicure in two consecutive nights. If you wait a couple of days in between steps, you’re more likely to have chipping on your base color, which will definitely affect the next coat; Resulting in a shortened life of your manicure. Oh and just a sidenote to this, I always do my manicures over two nights even when I’m not using a glittery polish. This has always seemed to extend the life of my manicures!

I’m definitely extremely happy with this manicure – the durability, length of wear and how BLINGY it is~! Who knew – a blingy manicure that ACTUALLY has staying power on natural nails~! Yes ladies, this definitely qualifies as a NAIL EPIPHANY in my books! ;)

Stay tuned, I have a lot of fun beauty posts coming up, as well as some DELICIOUS and easy recipes~! Till next time Chicas – take care, stay glam and KEEP IT BLINGY~! xoxo

Wham Bam, INSTANT Glam~!

In a world of drive thru coffees, drive thru dry-cleaners, drive thru pharmacies, and drive thru fast food ; why not a product that makes for an instant manicure? Well the convenience generation has finally invented a beauty product that IS a convenient manicure which not only delivers easy application – but staying power of 10-14 days on your natural nails! I have to say, at first I was more than a little skeptical, when most nail polishes chip within a couple days of application. But after going to my local drugstore and finding them on an amazing sale (plus I had some manufacturer coupons), and seeing that the patterns available could never be acheived by mere mortals; I thought I’ll give these little beauties a whirl~!

I’m talking about the new stick-on nail enamel strips. You can find them at your local drugstores and big beauty chains like Sephora. And yes, they are beauty tested – and I definitely approve! Speaking as a busy Mom, one who gets her hands dirty cleaning the house and dealing with the kids – these little inventions DO hold up better than most nail enamel (on natural nails). And anything that can keep my nails looking glam for up to 10-14 days with only one application – is a a little nail miracle in a box. I’ve tried so many brands (even salon brands) of nail polish and they all take only a couple days to start chipping pretty badly. And when this happens, after you’ve spent so long making them look so nice – it’s almost like why bother? Who has time to do their nails every other day? Most of us don’t – so these products are amazing for us with natural nails. (Although I’m sure they’d work just as well on fake nails)


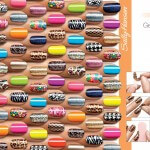
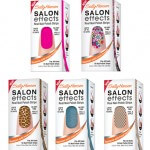
They come in many different brands – the ones I’ve seen are Sally Hansen Salon Effects, Kiss Nail Dress, and Sephora has their own brand of these as well. (I’ve also seen them at Sally Beauty Supply) I’ve tried Sally Hansen and Kiss so far, I have some Sephora beauties in my stash I have yet to try. Sally Hansen comes with 16 self adhesive nail strips in each package, while Kiss Nail Dress comes with 28 nail strips in each package. For my money – you get a better value with the Kiss Strips simply because they come with more per package – but Sally Hansen has a MUCH wider variety of patterns etc. Either way, when your nails are done – they look like they’ve been done at a salon – so when you look at it that way – both brands offer amazing value compared with getting your nails done at the salon. And that’s how you should compare it – these aren’t as cheap as nail polish, but they last longer, there’s no drying time or foul smell, and the designs are so intricate – its a much higher quality product overall.

What I found was, since I don’t have very long nails, with both Sally Hansen and with Kiss – to do all my 10 nails I only used 5 strips! So talk about adding extra bang for your buck~! Think about how many manicures you can get out of each box – now the price is looking even better. Especially when these often go on sale at Rite Aid and Walgreens, and there is frequently manufacturer coupons on both. If you don’t have any manufacturer coupons, don’t hesistate to ask your local drugstore’s beauty counter to see if they have any for you! They have saved me several times with coupons I didn’t have!

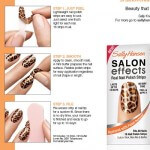
They way I apply them is:


1. First apply a good quality base coat. If you have natural nails like mine, make sure you invest in a good quality base coat, it really WILL extend the life of any manicure you do. Personally I got a huge bottle of Nail Life Gripper from Sally Beauty Supply for less than $5, and it will last for SO long!


2. Second, match up the right size strips to the corresponding nails before you unpeel them. I usually start with matching up a strip with a nail on my right hand (since I am right handed, my nail beds are slightly larger on the right hand) After I find the right size – I’ll turn it around and see which nail it will work with on my left hand. Now that you know which fingers to use first, unpeel the strip and apply it to the larger nail bed. Press down and smooth out very well. Then get a sharp pair of small scissors and cut the excess off right above your nail (being very careful not to cut yourself or your nail). Then take the other half and turn it around so that the smooth edge borders the cuticle, and apply it to your other nail. After this, use your nail file and smooth the edges so they are seemless at the end. I like to use the less rough side, so you don’t take off to much of the nail enamel. Repeat this smoothing and filing process and do this for all of your nails after you’ve applied strips to both hands.


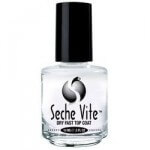
3. Apply a good quality top coat. I’m a fan of Seche Vite, and although it is pricey – ULTA or Sally Beauty will often have it on sale, so keep your eyes peeled for that! In addition Ulta will also have their coupons you can use on top of the sale prices – making it as cheap as any drugstore brand, but its much better!


Here you see, I just added a Sally Hansen Zebra nail strip to my ring finger on each hand to jazz up an otherwise boring manicure~! So if you aren’t ready to bling-up every finger on your hands, you can just add one or two strips to each hand, and it makes for a fun and very glam manicure.

Remember Chicas, you can keep it glam on a budget and even as a busy Mom, just pick up a package of these little beauties the next time you are at the drugstore beauty counter and treat yourself to a “salon-inspired” manicure. Its “Wham Bam, Instant Glam” for YOUR nails~!

Great Deals for Beauty Products?

BeautyDealsImage

What do you get when you combine a manufacturer’s coupon, with a store sale and in-store coupons??? An AMAZING, if not FREE, deal!!! Yes that’s right folks – coupons really DO save you money. LOTS of money! I’ve been couponing back before it was “hip” to do so ;) …before the TLC show “Extreme Couponing”, before there were coupon classes, coupon websites and all the other amazing resources we couponers have available to us now.

Now its easier than ever to make coupons work for you – saving money off of your grocery bill each time you go to the store and not just for groceries folks! But I’ll explain more about the grocery couponing in a later blog post. (Disclaimer: even tho I’m a die-hard couponer, doesn’t mean I’m a hoarder or any other similarity to those on the TLC show.) :) There are LOTS of coupons for beauty, skincare and haircare products, and they are quite often substantial amounts off each product. So, I’ll lay out the key factors to helping you save money on all of your beauty purchases.


1. Flexibility


First thing is being flexible and willing to try new products. Most often when companies release the limited time products and or colors, they will frequently put out coupons in the Sunday Papers, In-store coupons and in Magazines. The flexibility comes into play more often in getting products for “free” – because usually companies don’t offer HUGE discounts for the top selling/regular products – its always the ones they are just putting out. You can still save a bundle on your regularly used “core” products, but if they’ve been around for awhile – chances are that the coupons available on those are not sufficient enough to get them for free. Although – keep your eyes peeled on blogs and websites, because once in a blue moon you might be able to find one of those for free too!

And although I definitely have my “core” beauty products (ie my foundation, mascara and certain color of lipstick), beyond that I’m always willing to try something new especially when its for free or at a greatly reduced price. That’s how I’ve discovered so many great products – because the great ones aren’t always necessarily the most advertised ones. That’s definitely something to remember. Because as you’ve read from my Beauty VIP Products blog post – one of my faves is Wet and Wild Eyeshadow and Blush. And when was the last time you’ve seen a Wet and Wild Commercial??? For me – don’t think I ever have. And that’s another reason they’re able to keep the prices so low, not because it isn’t a quality product! (Gee, they should be sending me free products for all this free advertising I’m giving them, right? haha just kidding!)

And with certain stores (Rite Aid, Ulta, Walgreens) offering money-back guarantees if you don’t like your product, its a win/win situation! (By the way – products usually must be returned within 30 days with a store receipt) That more than makes up for the fact that they often lack testers for their products – YOU get to be the tester at THEIR risk! :)


2. Sunday Papers


I also buy a couple Sunday papers each week (well, actually 4 ). But I figure, since I have a family of four, that’s more than reasonable. Although I will tell you I buy the Sunday papers, not because of beauty (manufacturer) coupons but largely for the grocery coupons. The beauty coupons are just icing on the coupon cake! So while organizing my coupons – I’ll have a special “beauty” section that I will keep separate from my grocery coupons – so I have these coupons at the ready for any “impulse” buying. ;) Cause you just never know when you are going to be out looking for something else – and find your fave lipstick or mascara on sale or clearance – gotta be ready to double up the sale with some manufacturer coupons!

Also in the Sunday Papers, aside from the manufacturer coupon inserts, are the weekly ads for your local stores (ie Fred Meyer,Walgreens, Rite Aid, etc) – and each week they’ll have special deals on certain brands of beauty products. The stores I’ve scored the BEST deals on beauty would definitely be Walgreens, Rite Aid and ULTA – because with each of these stores they’ll offer their sales, PLUS store coupons and often store rebates! And you’re able to use ALL three in a single transaction on a single item (note – only 1 manufacturer item per product per purchase – sometimes with a max of 4 in a single day. Check the terms and conditions on the coupons and store policies for specifics – cause in no way am I trying to promote breaking of/or abusing of the rules pertaining to using coupons.)


3. Magazines/Websites/Blogs

There are a few blogs that I check frequently, and you can actually subscribe to the ones you enjoy so it will just show up in your email everytime there is a new post. One that I love is http://www.frugallivingnw.com/ – this one is pertaining mostly to my area, so you might want to google coupons sites for your specific area and find one that appeals to you. With these blogs – they do most of the work for you! They tell you which coupons you need and where to get them, to get any specific product for a certain price/free. Definitely a lot easier than when I first started couponing! :)

And it never hurts to keep abreast of certain magazines that will offer great coupons on beauty products – some of the ones I’ve seen that offer great beauty coupons on a regular basis are In Style, People StyleWatch, Allure, Glamour, and last but NOT least – “All You” Magazine (which is exclusive to Wal-Mart only). I have a few subscriptions – so I’m definitely cutting out any coupons that are available in those magazines. And if you find yourself buying a couple of issues of any specific magazine throughout the year – you might want to weigh the price of a subscription against buying say 3 in any given year at the store. You’d be surprised how cheap the subscriptions are offered at vs store price. So definitely do your homework – on your blogs/magazines etc….

And for me – when I’m “trolling” ;) the coupon websites etc its usually for grocery coupons – but I always have my “beauty product” radar on! ;) So that’s when I’ll discover greatly reduced/free offers. Several coupon websites, blogs and even Facebook offer printable coupons on many of the top beauty brands – so check their websites and their Facebook websites as well. Several stores I’ve signed up for email and text coupons – so when a new set of coupons come out – I get them directly to my email inbox or to my phone via texting! Talk about techie couponing~! (Currently a few that I have coming to my inbox are Target, JcPenney, Fashion Bug, Ulta, and LOTS more!)


3. Check your Clearance Sections


Sounds so simple – but how often are you in a store for a specific item, buy it and leave? Wander over to the clearance section in any store and see what’s offered – often products are being clearanced to make room for new products. And to get rid of them quickly retailers will offer them at a huge discount, these products still qualify for your manufacturer coupons (and sometimes even store coupons – refer to store/coupon policies for specifics).


4. Do Your Homework


Armed with all of the above information – make sure you have the necessary coupons clipped, and your list neatly laid out and in hand so when you get to the store you know specifically which brands and products and sizes are the ones that match up with your coupons. Don’t rely on the store to always display their sale prices – I’ve been at the stores several times when these tags are missing, but if you have your list and your coupons it won’t matter.


5. Stay Current with the Sales and Coupons


As often the sales change weekly and even some coupons can – this is a key step. Another key factor if your seriously looking to score on these great deals on beauty products is to always be aware of the sales and coupons in your area. If you’re randomly checking sales once a month or say, when you run out of a product – chances are you will have to pay full price. What I always do is when checking the sales/coupons, if I find one of my core products a huge discount – I’ll pick up a couple and put them away till I run out of my current one. Ensuring I never have to pay full price. This also applies in the free product situations – if you are staying current with your sales/coupons – you’ll be able to score those free deals before they expire or even run out of stock. Which often does happen when a product is offered for free – you’ll see stock depleting fast in your store if you don’t jump on the deal as soon as possible.

In the event that you aren’t able to get it before they run out of stock, sometimes certain stores will be able to offer you a rain check for the item at the sale price. Make sure and show them your manufacturer coupon at the time they issue the rain check – because certain stores will staple that coupon/coupons to the rain check and even if the manufacturer coupon is expired they’ll still honor it because they were out of stock. And for those of you with smart phones and app stores – I have a Coupon App for my phone (that I got for free) and it alerts me to all the deals and FREE stuff in my area – dining, coupons, shopping etc! Its a priceless resource!


6. Prestige Cosmetic/Department Store Brands
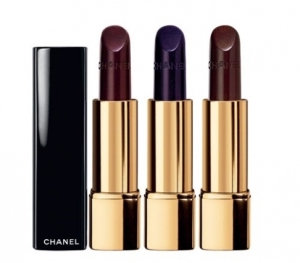

For those of you trying to score the top department store brands (Nars, Mac, Clinique etc) at lower prices, there are ways but you won’t find them as inexpensive as your drugstore brands. Often certain stores do offer clearances at the end of season on these top brands. Stores I’ve seen that offer great deals on these higher end cosmetics would be – Ulta, Sephora and even Cosmetic Outlet Stores. Also consult trusted online store (ie Amazon) and you just may find great deals on those higher end cosmetics and even cosmetics that have formerly been discontinued. So keep your eyes peeled – you can score on these – but its a little more challenging and not as often.

Well that’s all for me gals. If I can think of anymore tips- I’ll definitely update this list. Hopefully you’ve learned a thing or two and enjoy scoring some AMAZING beauty deals in your area! Feel free to share any great/free deals you’ve been able to score – I’d love to hear about it! And remember girls – we can always keep it glam while also keeping it inexpensive~! ;)