Hello My Beauties~! I know its been a while since my last post – we’re finally getting over the “hump” of being sick. And we’re feeling better – and back to blogging for me~! I’ve got a lot of fun beauty posts coming up; but I wanted to start out with this fun Nail Review. This is really exciting! (I know – what can I say – all things girly excites me~!) Below is a few of the glittery nail polishes I have in my stash that will now be getting a LOT more use~!

As many of you know, I have natural nails. And in the recent months I’ve been frustrated (to say the least) with my stash of glittery, blingy nail polishes. I’ve tried ALL different brands, and no matter what brand I use – after only a day or two of wear, my nail polish will literally start peeling off! I’m always meticulous to prep my nails properly, file them, take care of the cuticles etc etc…I’ve had enough manicures to know just how to duplicate it at home. And yet after all that effort the nail polish won’t chip, like regular nail polish, but peel off! That is until now~!

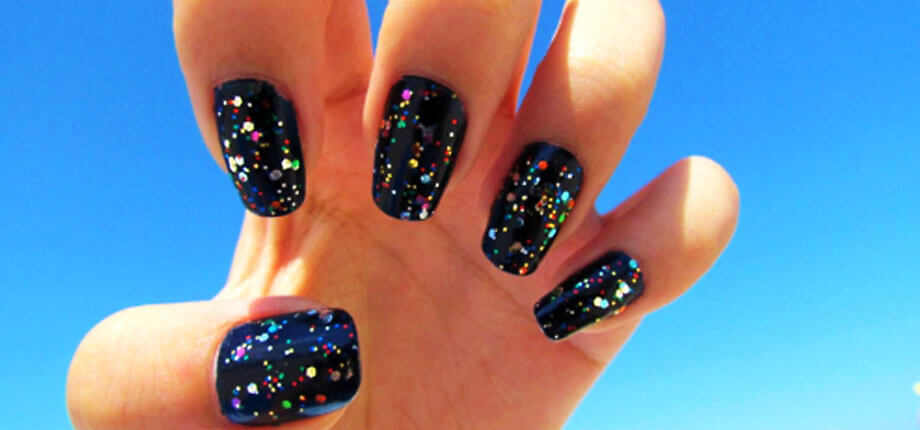
You see this??? This is my beautiful, glittery pink manicure after SEVEN days of wear!!! Yes, count’em ladies – 7 days~! And I’m not easy on my nails – doing dishes, helping my boys with their projects etc! So I definitely wanted to share with you all the secret to a “Long-Lasting Blingy Manicure”~! The trick here is doing it in two parts over two days, as well as having a good quality colored polish underneath. Over the course of two nights makes it less time each night and also allows the nail polish to fully cure and harden between layers. The good quality colored polish underneath the glitter polish, allows the glitter coat less chance of peeling because of our natural nail oils.
The First Evening

1. Apply a good base coat, after filing, buffing, and fully prepping your nail beds . I use this one from Sally Beauty Supply – its a HUGE bottle~! http://www.sallybeauty.com/Gripper-Basecoat/SBS-113140,default,pd.html

2. Apply two coats of the Sally Hansen Complete Salon Manicure for the next step. Here I’m using #530 “Back to the Fucshia” (a gorgeous, bright, vibrant pink); I’ll often choose a color close too/similar too the glittery polish I’m using. What I love about this polish, aside from the awesome brush, it has great staying power on natural nails! Much better than OPI! But that’s a personal choice – I’ve tried SO many brands, and I’ve experimented with different base coats, manicure techniques etc. And these little polishes I find are by far the best of the bunch! Sally Hansen Website: http://sallyhansen.com/ and here’s the Sinful Website (Currently under construction) http://www.sinfulcolors.com/

3. Lastly, apply a good quality top coat and let dry. Don’t mess with your nails too much for a good while. I always try to do my manicures after putting my kids to bed, in the evening right before I go to bed. That way all the household chores, or playing with kids etc won’t interfere with your manicure. This is the last step for this evening. http://seche.com/products/product-83005.html
The Next Night
1. Apply the base coat on top of your existing manicure.
2. Now apply the Glittery polish to your nails – two coats total. I used the Sally Hansen Gem Crush in #06 “Razzle Dazzler” for all of my nails except the ring fingers on both hands. On my ring finger on both hands, I used SinFul Colors #923 in Queen of Beauty (a silver glitter). I usually like to do a different color on my ring fingers when doing my manicure – makes for a fun, yet interesting, looking manicure~!
3. Now its time for the final step, which is applying your top coat! Again, try to do this right before bed so your nails will have a good amount of time to dry and cure without any interference.
And VOILA – that’s IT~! Not terribly difficult, or time consuming – but doing the manicure in these two steps over two night really does extend the life of your manicure! In the past, I’ve tried just doing the whole manicure in one night, or changing up how many coats you use, etc to no avail; It still would end up chipping or peeling. It really seems to make a difference dividing this up into two nights, doing so lets the polish cure and harden in between coats which results in the extended life of a manicure! And make sure to do this manicure in two consecutive nights. If you wait a couple of days in between steps, you’re more likely to have chipping on your base color, which will definitely affect the next coat; Resulting in a shortened life of your manicure. Oh and just a sidenote to this, I always do my manicures over two nights even when I’m not using a glittery polish. This has always seemed to extend the life of my manicures!
I’m definitely extremely happy with this manicure – the durability, length of wear and how BLINGY it is~! Who knew – a blingy manicure that ACTUALLY has staying power on natural nails~! Yes ladies, this definitely qualifies as a NAIL EPIPHANY in my books! ![]()
Stay tuned, I have a lot of fun beauty posts coming up, as well as some DELICIOUS and easy recipes~! Till next time Chicas – take care, stay glam and KEEP IT BLINGY~! xoxo
Comments