Ever see the clear, double-walled, hard plastic cups (in tall, grande or venti sizes) for sale at Starbucks??? As they come, they are kind of boring right?? Well we’re going to change that!! Its time to personalize and GLITTERFY your clear Starbucks tumblers!!! These cups are wonderful little inventions since you can re-use them for your favorite Starbucks drinks (some Starbucks stores even give discounts when you bring it in for them to fill), but you can also use them at home for your own creations! And you all know how much I love the bling, right?? So when I saw a lady on Instagram add some glitter to her cup, I thought – YES!!! This would be a fun little project to put my own spin on, with a beautiful blingy end result!!!
Happy December All~!!! Hope this article finds you all in good health and in good spirits!!! We, at our house, are in good spirits, albeit getting over the flu right now. The silver lining??? We’re sick in the beginning of December and not during Christmas!!! So I’m definitely thankful for that!!!
Now that it’s December, it’s also time to start thinking about Christmas Gifts too! And whether you are personalizing a Starbucks cup for yourself or for someone else as a gift – its a fun, easy project! I did however have some trials with my Starbucks cup, thanks to my ambitious ideas. ![]() No, I couldn’t just do a solid glitter – I had to do stripes of glitter (in all different colors)~!!! And I’m happy to share with you the ups and downs – and how you can avoid some of the mistakes I made.
No, I couldn’t just do a solid glitter – I had to do stripes of glitter (in all different colors)~!!! And I’m happy to share with you the ups and downs – and how you can avoid some of the mistakes I made. ![]()
If you haven’t seen these cups, here’s a picture of the “undecorated” version, as they come in the store:

These come double-walled, so the inside tumbler screws out of the outer wall. Which makes for easy personalization! And I’m “cold drink” kinda girl! I love cold drinks all year long (weird, I know). And these work so well for your fancy coffees, but equally well for ice-cold water, juice and/or pop! Definitely multi-use!!!
The Supplies:

Hello Glitter, nice to meet you ![]()

Eeeny, meenie, miney, moe…..Which to choose???

After careful consideration, these were the colors I chose. I was definitely feeling the metallics!

Aside from the glitter, you also need a spray adhesive, hair spray, painter’s tape, and I found these cool rhinestone sticker in the craft store (more on that later).
Time to Get Crafting:

I started by taking painter’s tape and cutting it in half (lengthwise) – so I’d have thinner strips.

Then I started applying the strips in downward spirals on my cup. Yes, I was getting kinda ambitious with it!! (haha)

Once I had the pattern all laid out, I went ahead and started planning and labelling which color would go where. That way I wouldn’t have any color accidentally repeated beside itself! (Yes, I’m a notorious planner! haha)

After all the planning, and labelling was done I sprayed the area I would cover with any given color and then pour glitter over top. Making sure to pour the glitter overtop a paper plate, so all the excess I could just pour back into the bottle.

And more glitter gets applied!

I did cover the top with painter’s tape, so as not to glue glitter to the part that screws into the outer shell of the cup.

Once I had all of the exposed areas covered in their respective colors of glitter, I began removing the tape strips one by one. But ONLY one at a time. Then I’d spray it with glue and cover in glitter, then remove another strip and repeat the process; until all strips were removed and covered in the planned colors of glitter.

Here’s my “Wild and Blingy” cup, starting to take shape!!!


Once all the glitter has been applied, I removed all the tape and then sprayed it with several coats of hair spray.
Important Tip #1
When adding the glitter to the cup, in some areas I added a couple layers of glitter so the color would stand out more. If I had to do over again, I wouldn’t have done this because when I went to screw the inner cup into the outer cup, I had some difficulty! I didn’t realize that there wasn’t a lot of room (read VERY little room) between the outer and inner walls. Lesson Learned! Next time – I’d make sure and only apply 1 coat of glitter~! ![]()
A Fun Twist

After letting the glitter set, I wanted to apply these rhinestone stickers to add interest and dimension! BUT, things didn’t go as I’d planned…..

And this is what it looked like with the stickers applied! Gorgeous right??? One BIG problem, well actually two!!! So here come the next couple tips I have for you:
Important Tip #2
My stickers didn’t stay on, they literally stayed on for 20 minutes or so, and ALL started lifting. If you decide to add stickers like these, make sure to affix them with a PERMANENT adhesive!!! Not just the adhesive they come with on their backs.
Although I have to say, its a good thing I didn’t permanently affix these to my cup. Because, in an attempt to keep the stickers on, as I saw they began peeling I quickly tried to screw the inner cup to the outer one. Only to get a nasty surprise: they wouldn’t FIT!!!! I was SO bummed!!! But, because I’d added a couple layers of glitter, AND the stickers, I’d added too much and I had to remove the stickers in order to get the two parts to screw together properly!!! These leads me into the next important tip…
Important Tip #3
If you are going to add some fun, dimensional stickers to your inner cup. Make sure you lay them across your cup, and try screwing the two parts together before adhering them onto your cup. This way, you’ll see whether it will fit properly! Something I had to learn the hard way. ![]() Oh well, live and learn, right???
Oh well, live and learn, right???
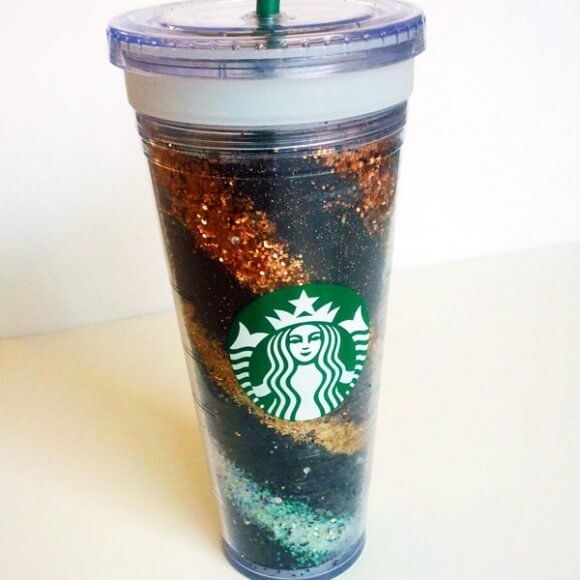
So BACK we went to the original design – without the rhinestone stickers. (sad face) But still cute, right???
The Finished Product

I do love it!!! But, if you look closely at the bottom you’ll see some scratches where, when I was trying to screw the two parts together the inside of the outer shell got a little scratched from the rhinestone stickers. Thankfully its not that noticeable, unless you look closely! Also I should have left the inner (glittered) cup out to dry overnight, before putting the two parts together. Because as you see, the bottom has a little bit of “sweat/condensation” . Which leads to our next important tip…
Important Tip #5
After applying the glitter, stickers, and/or adhesive, I’d recommend letting it dry overnight or for several hours before putting the inner cup inside the outer cup. This will prevent any additional “sweating” between the layers.
What do you think??? Do you have one of these cups??? And if so, is this something you might do to personalize yours??? I certainly had a lot of fun working with glitter (shocker, right?..spoken with much sarcasm ![]() ). This would also make a fun Christmas gift, for those of you thinking of ideas of gifts you can make and/or personalize~!!!
). This would also make a fun Christmas gift, for those of you thinking of ideas of gifts you can make and/or personalize~!!!
Till next time my beauties, you can always keep those crafts creative, fun, and whimsical, while also keeping it BLINGY~!!!! Much <3, hugs and blessings~!!! xoxo
Comments